
What should the work solve?
Look at the existing wall condition and the reason for replacement. Loose material, damaged drywall or an awkward previous layout need different preparation from a simple surface change. A new backsplash should not conceal an unresolved moisture or wall-support problem.
Counters and cabinets may remain if they can be protected and the new finish fits their dimensions. Existing outlet and switch positions need review. Replacing a counter later can disturb the backsplash, so settle the intended sequence before refreshing only the wall.
Three decisions to work through
Find the visual starting point
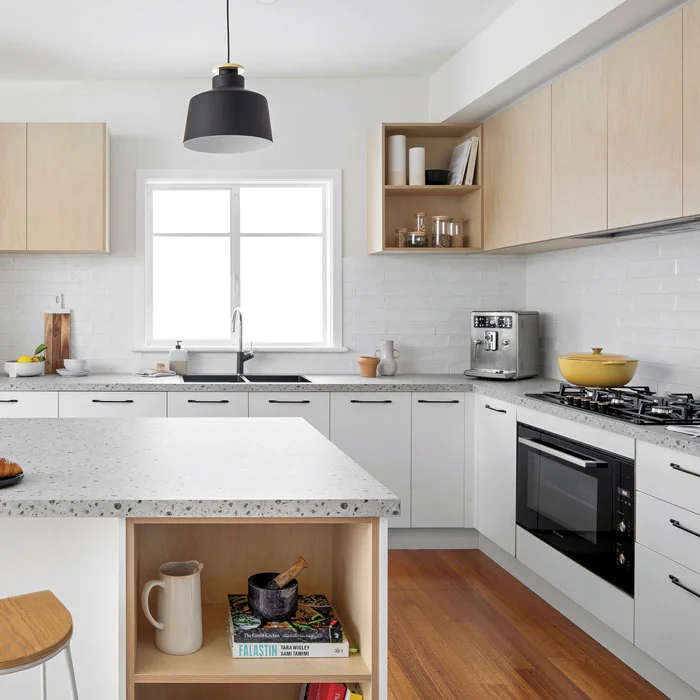
Decide which area should control the pattern: the cooking wall, a window, a long counter run or another focal point. Check how the layout ends at both sides and beneath cabinets. A balanced arrangement may require adjusting the starting position. Review those cuts before installation so the chosen pattern works across the whole wall.
Compare material with light
Hold a representative sample beside the counter and look at it with the intended under-cabinet lighting. Texture, gloss and joint contrast can become more apparent in grazing light. The backsplash should work with the room’s other surfaces rather than being selected in isolation. This also helps decide whether a strong pattern or a quieter finish suits the space.
Include the small finishing components
Edge trim, outlet treatment, corner details and the counter junction are part of a complete installation. Ask which materials and finishing methods are specified. These elements can change the appearance even when the field tile is identical. Keeping spare material and product information can help with later work around an outlet or fixture change.
Measurements, materials and options
Measure each wall segment, openings and returns, and identify the upper and side boundaries. Include the range area rather than assuming one consistent height. Tile quantity depends on the chosen pattern, cut planning and waste allowance, not just the plain wall area.
Compare tile sizes, finish, pattern and grout appearance on a representative sample. A large-format tile may reduce joints but introduce different cuts around outlets. A small mosaic has more joints and a different visual texture. Natural materials may require product-specific care.
Decide how outside edges, corners and the junction with the counter will be finished. Align the layout around the most visible focal area rather than beginning arbitrarily at one end. Small cuts beside outlets or beneath cabinets can influence the final appearance.
Preparation and installation
Remove unsuitable finishes, assess the backing surface and protect nearby components. Confirm outlet and switch arrangements with the appropriate trade where alteration is needed. The substrate and installation products should be suitable for the selected finish and location.
Verify the surface, establish the layout and complete preparation before setting the material. Allow the specified setting period, complete grout and appropriate movement joints, then fit finish components and review the installation. Product instructions determine the relevant cure stages.
Countertop replacement changes the height and edge of the backsplash start line. Under-cabinet lighting can make texture and joints more apparent. Appliance placement affects access to the cooking-wall section. Coordinate these decisions before the tile layout is finalized.
Walkthrough and long-term care
Review cut locations, alignment, edges and the appearance of joints in the room’s normal light. Confirm that outlet covers fit properly and that the specified transitions are complete. Keep spare matching material where practical for a later repair.
Follow care guidance for the tile, grout and any sealer used. The same cleaning method may not suit glass, ceramic and natural stone. Attend to failed joints or moisture signs rather than repeatedly cleaning around an unresolved issue.
A strong pattern can be the focus of the room, while a quieter backsplash may work better with a highly varied counter. Compare a sample of both together. The most expensive tile can still look poorly resolved if edge treatment and cut planning are overlooked.
Budget for the complete scope.
National planning information, not a service quote.
The room-level ranges come from the supplied project brief and the website’s planning model. They are not a current market survey or a fixed offer. A focused service needs its own scope and quote; its price should not be inferred from the whole-room total.
Ask the project estimate to separate retained components, selected products, preparation and installation. Identify removal, disposal, connections and finish repairs where they apply. Confirm whether an amount is an allowance or a defined price and how substitutions will be approved. This gives you a basis for comparing the same scope rather than comparing unrelated headline figures.
The kitchen cost estimator explores an indoor room-level range. Available area factors use a regional wage comparison as a planning proxy; they do not measure every cost at your property. Final pricing follows an assessment of the home, agreed work and selected products. Ask how any concealed condition will be documented and priced before additional work is authorized.
Timeline: separate ordering from kitchen downtime.
The counter height and outlet positions need to be established before the final wall layout. Substrate preparation, setting material and grout or sealant stages have their own product-dependent return-to-use requirements.
Request a schedule that identifies the decisions needed from you, product ordering, site readiness and the period when affected parts of the kitchen cannot be used. A delivery date is not the same as a completed installation. Show any dependent trades and required inspection points so the plan reflects the full sequence. If something changes, ask which later milestones are affected before assuming the original completion date still applies.
Questions for your project conversation
- Which parts of the existing kitchen are suitable to retain?
- What measurements, product specifications or further assessments are needed before ordering?
- What preparation, connections and finish repairs are included?
- Which selections or approvals could delay the start?
- How will additional work and changes to the schedule be agreed?
Bring room photos, approximate dimensions and the priorities that matter most. Include your city and state, property type and any known building restrictions. These details help frame the discussion; they do not replace field verification. Avoid ordering a replacement solely from a photograph or nominal size when the installed fit and utility requirements have not been checked.
Prepare a useful estimate brief.
Describe your desired result in practical terms and distinguish essential work from optional upgrades. For backsplash installation, use the scope and decision points above to identify what is changing and what stays. List products you have already selected and note whether their specifications have been checked. If you have a budget ceiling, state it before the proposed scope expands around additional features.
Ask for the included work and exclusions in writing. Clarify who handles product ordering, site preparation and the interfaces with other components. Keep the approved selections and any later revisions together. This helps everyone work from the same information and gives the final walkthrough a clear reference rather than relying on a general description of the room.
Kitchen Remodeling Renovations has 30+ years in business and 1,000+ successfully completed projects. Call (877) 907-2217 with your location and project priorities to discuss the next step. You can also prepare a project summary before calling. The website summary stays in your browser; it does not send an online request or reserve an appointment.